

- Step 1: Set Up Attributes
- Step 2: Create the Product in WooCommerce
- Step 3: Set Up Product Variations with Previously Created Attributes
- Step 4: Fill Out Variation Product Data
Offer more choices to your customers with a set of variations on a product all while having control over prices, stock, images and more.
Some examples:
- Different sizes and colours of clothing (small, medium, large)
- Selection of material used for handcrafted goods (sterling silver, copper, gold)
A few definitions that may be helpful along the way:
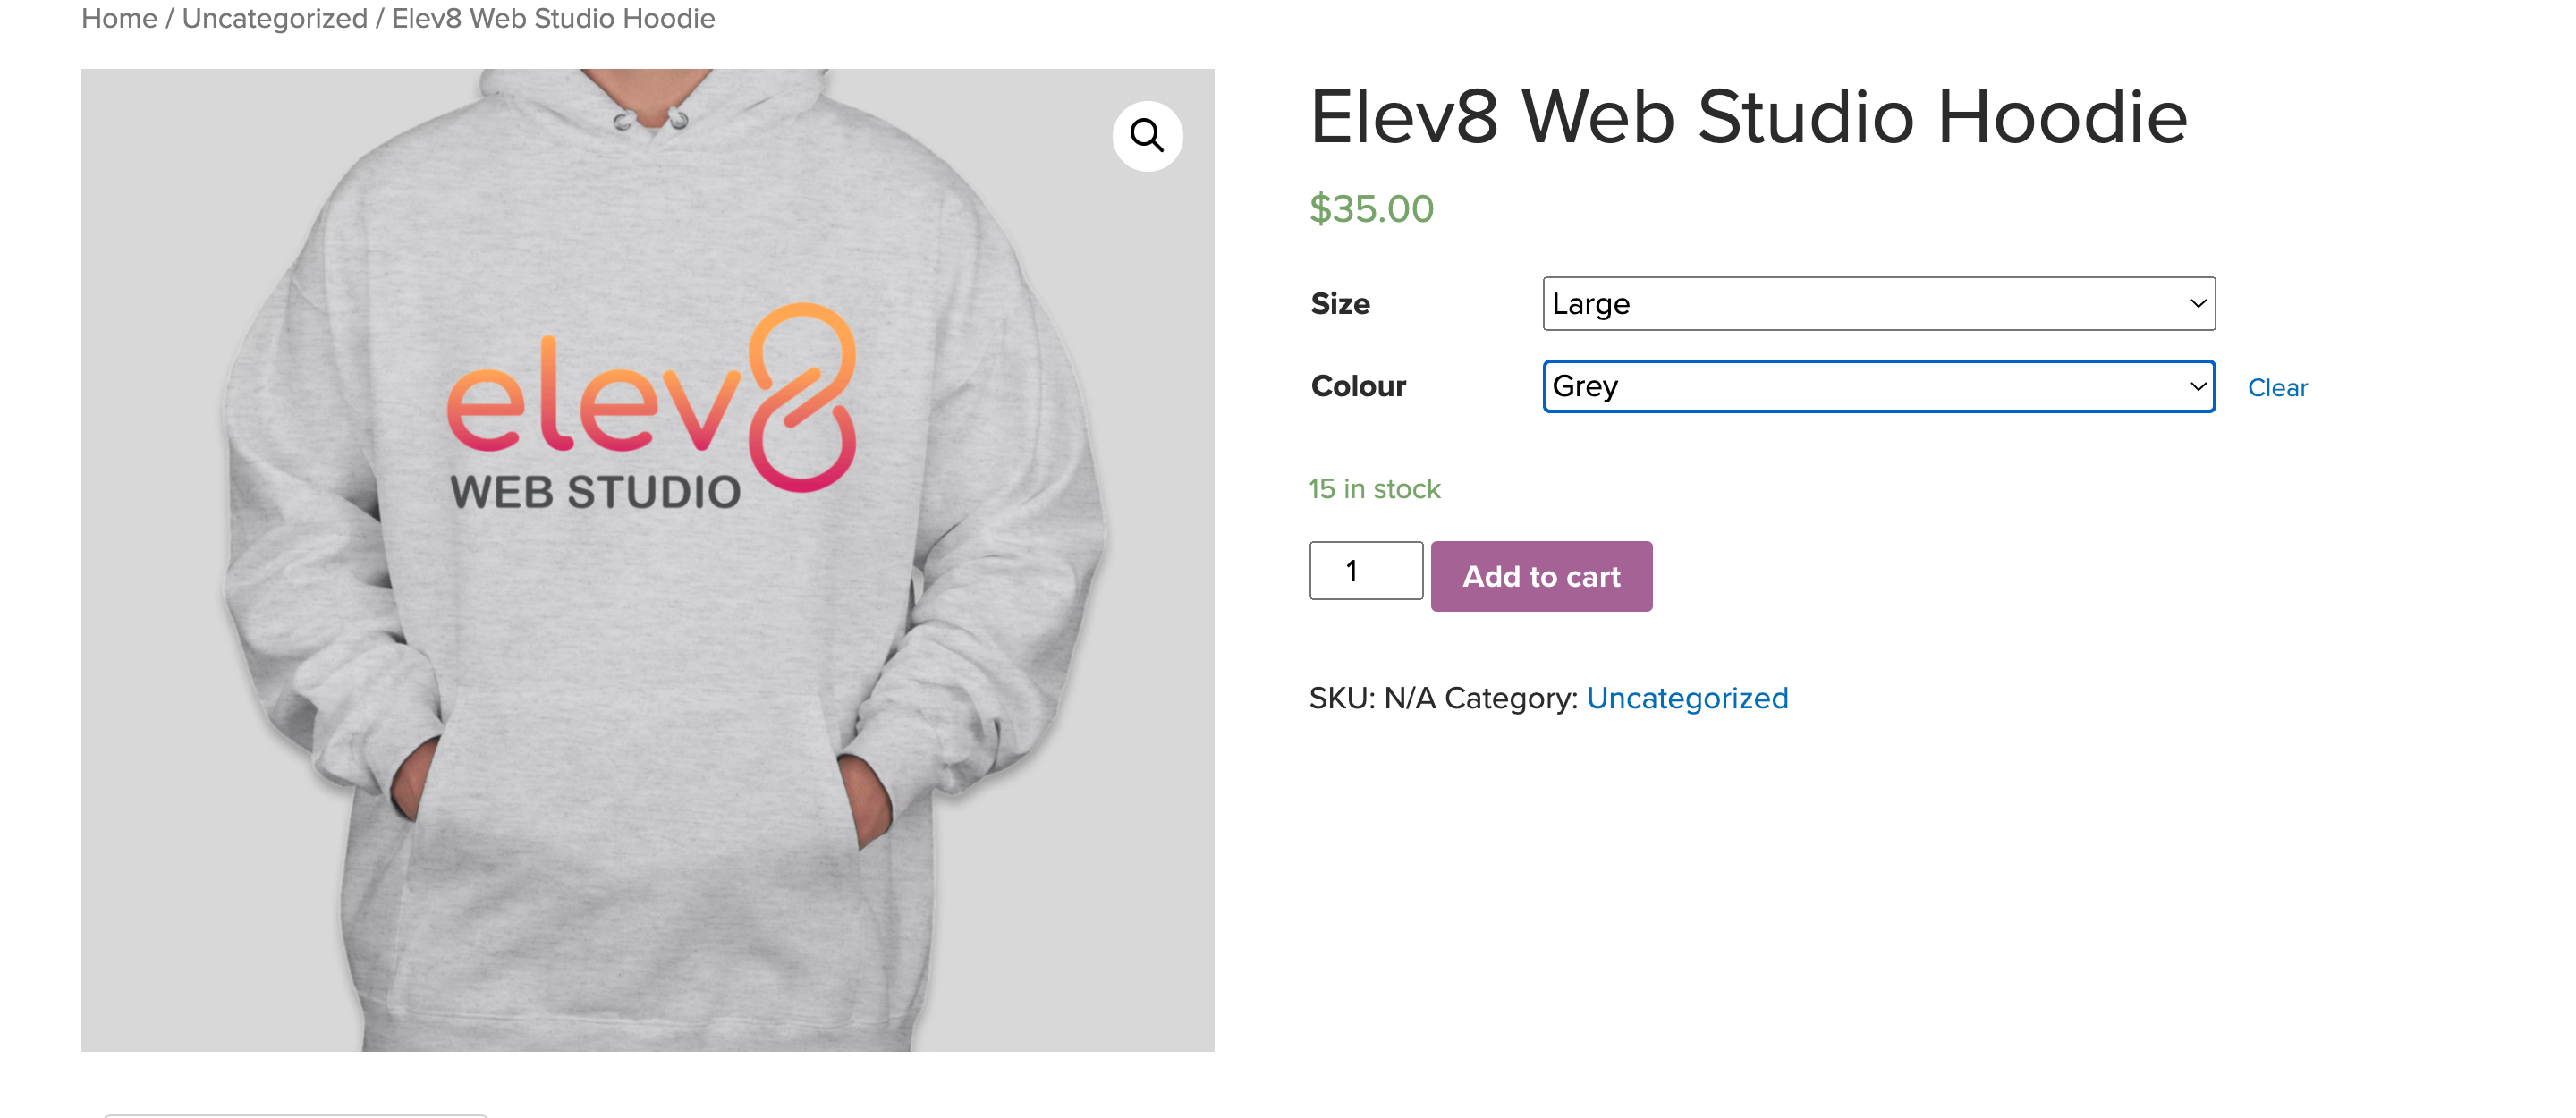
Let’s start by working with the following product:
Product: Elev8 Web Studio Hoodie
Available Sizes: Small, Medium, Large
Available Colours: White, Black, Grey
1
Set Up Attributes
- From the menu on the left, go to Products > Attributes
- Enter the attribute name and slug, then click Add attribute.
- Example: Size, Colour.
- Next to the Attribute name, select Configure Terms.
- Enter the term name and slug, then click Add new.
- Example: Size: Small, Medium, Large
- Repeat the above steps for as many different attributes as you like.
2
Create the Product in WooCommerce
- From the menu on the left, go to Products > Add new
- In the Product Data section, select Variable product from the dropdown menu.
- Define your tax status.
- Fill out your product details: name, short description, product tags/categories, image.
3
Set Up Product Variations with Previously Created Attributes
- In the Product Data section, go to Attributes on the left hand side.
- Select one of the attributes you previously created from the dropdown menu and click Add.
- Make sure “Used for variations” is checked.
- To enter the values for that attribute, click the Values field and select the terms you previously configured.
- Click Save attributes.
- Next, go to Variations on the left hand side.
- Select Create variations from all attributes and click Go.
- You will be prompted to confirm this action, click OK.
4
Fill Out Variation Product Data
You can now fill out product data for each variation, i.e: SKU, price, stock, image, weight & dimensions, shipping class, etc.
- Click the arrows on the right hand side to expand / close and edit details for each variation individually.
- Note: Make sure to check off Manage Stock to fill out individual stock numbers.
- Remember to click Publish or Update to make the variations visible on the front end of your shop.