
Did you know that you can significantly reduce cart abandonment by offering your customers a variety of shipping methods? The more flexible your shipping options are, the more likely shoppers are able to find what works for them and follow through with a purchase. In addition, as a store owner, you might need to offer different shipping rates depending on the type of product you sell or by geographical area.
As more and more online stores look to expand their shipping horizons let’s take a look at how we can get the ball rolling with Shipping Classes and Shipping Zones.
First of all, what’s the difference?
Can they be used together?
- Yes! And we will explore that closer to the end of this post, but if you would like to skip ahead, feel free!
Shipping Zones
Shipping Zones allow us to control what shipping options customers see depending on where they are located. Customers enter their address and shipping is calculated through their corresponding zone.
A few examples:
- I want free shipping to all customers located within the province.
- I want to allow local pickup for those within our City/County ONLY.
- I want flat rate shipping to customers within the country, outside of the province.
Step 1: Setting Up Shipping Zones
- Go to: WooCommerce > Settings > Shipping > Shipping Zones.
- Select Add shipping zone.
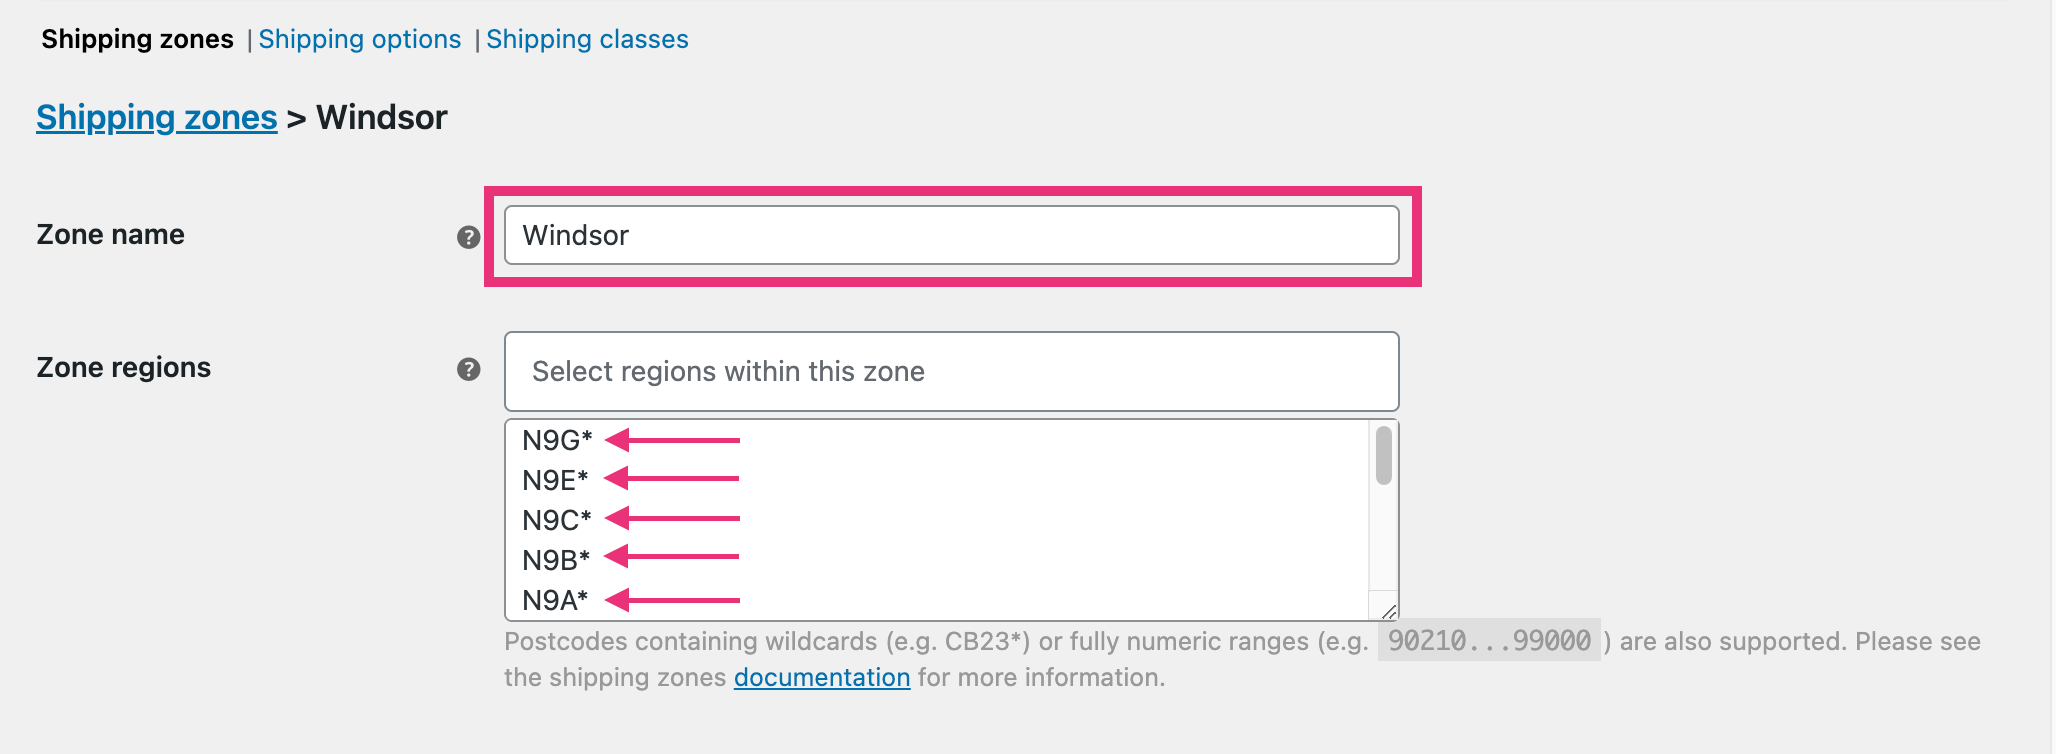
- Name the zone.
- Click on the Zone Region field to select all regions that apply.
- Select Save Changes.
Tip
Narrow down your zones. Select Limit to specific zip/postcodes and enter your codes line by line. Using an *asterisk next to the first 3 characters will automatically include ALL regions within that postal code.
Step 2: Add Methods to Shipping Zones
- Select Add shipping method.
- There are 3 basic shipping method options offered by the WooCommerce base plugin:
- Flat Rate / Fixed Cost
- Local Pickup
- Free Shipping
- Select the shipping method of your choice and once again select Add shipping method. You can also add more than one shipping method to a zone.
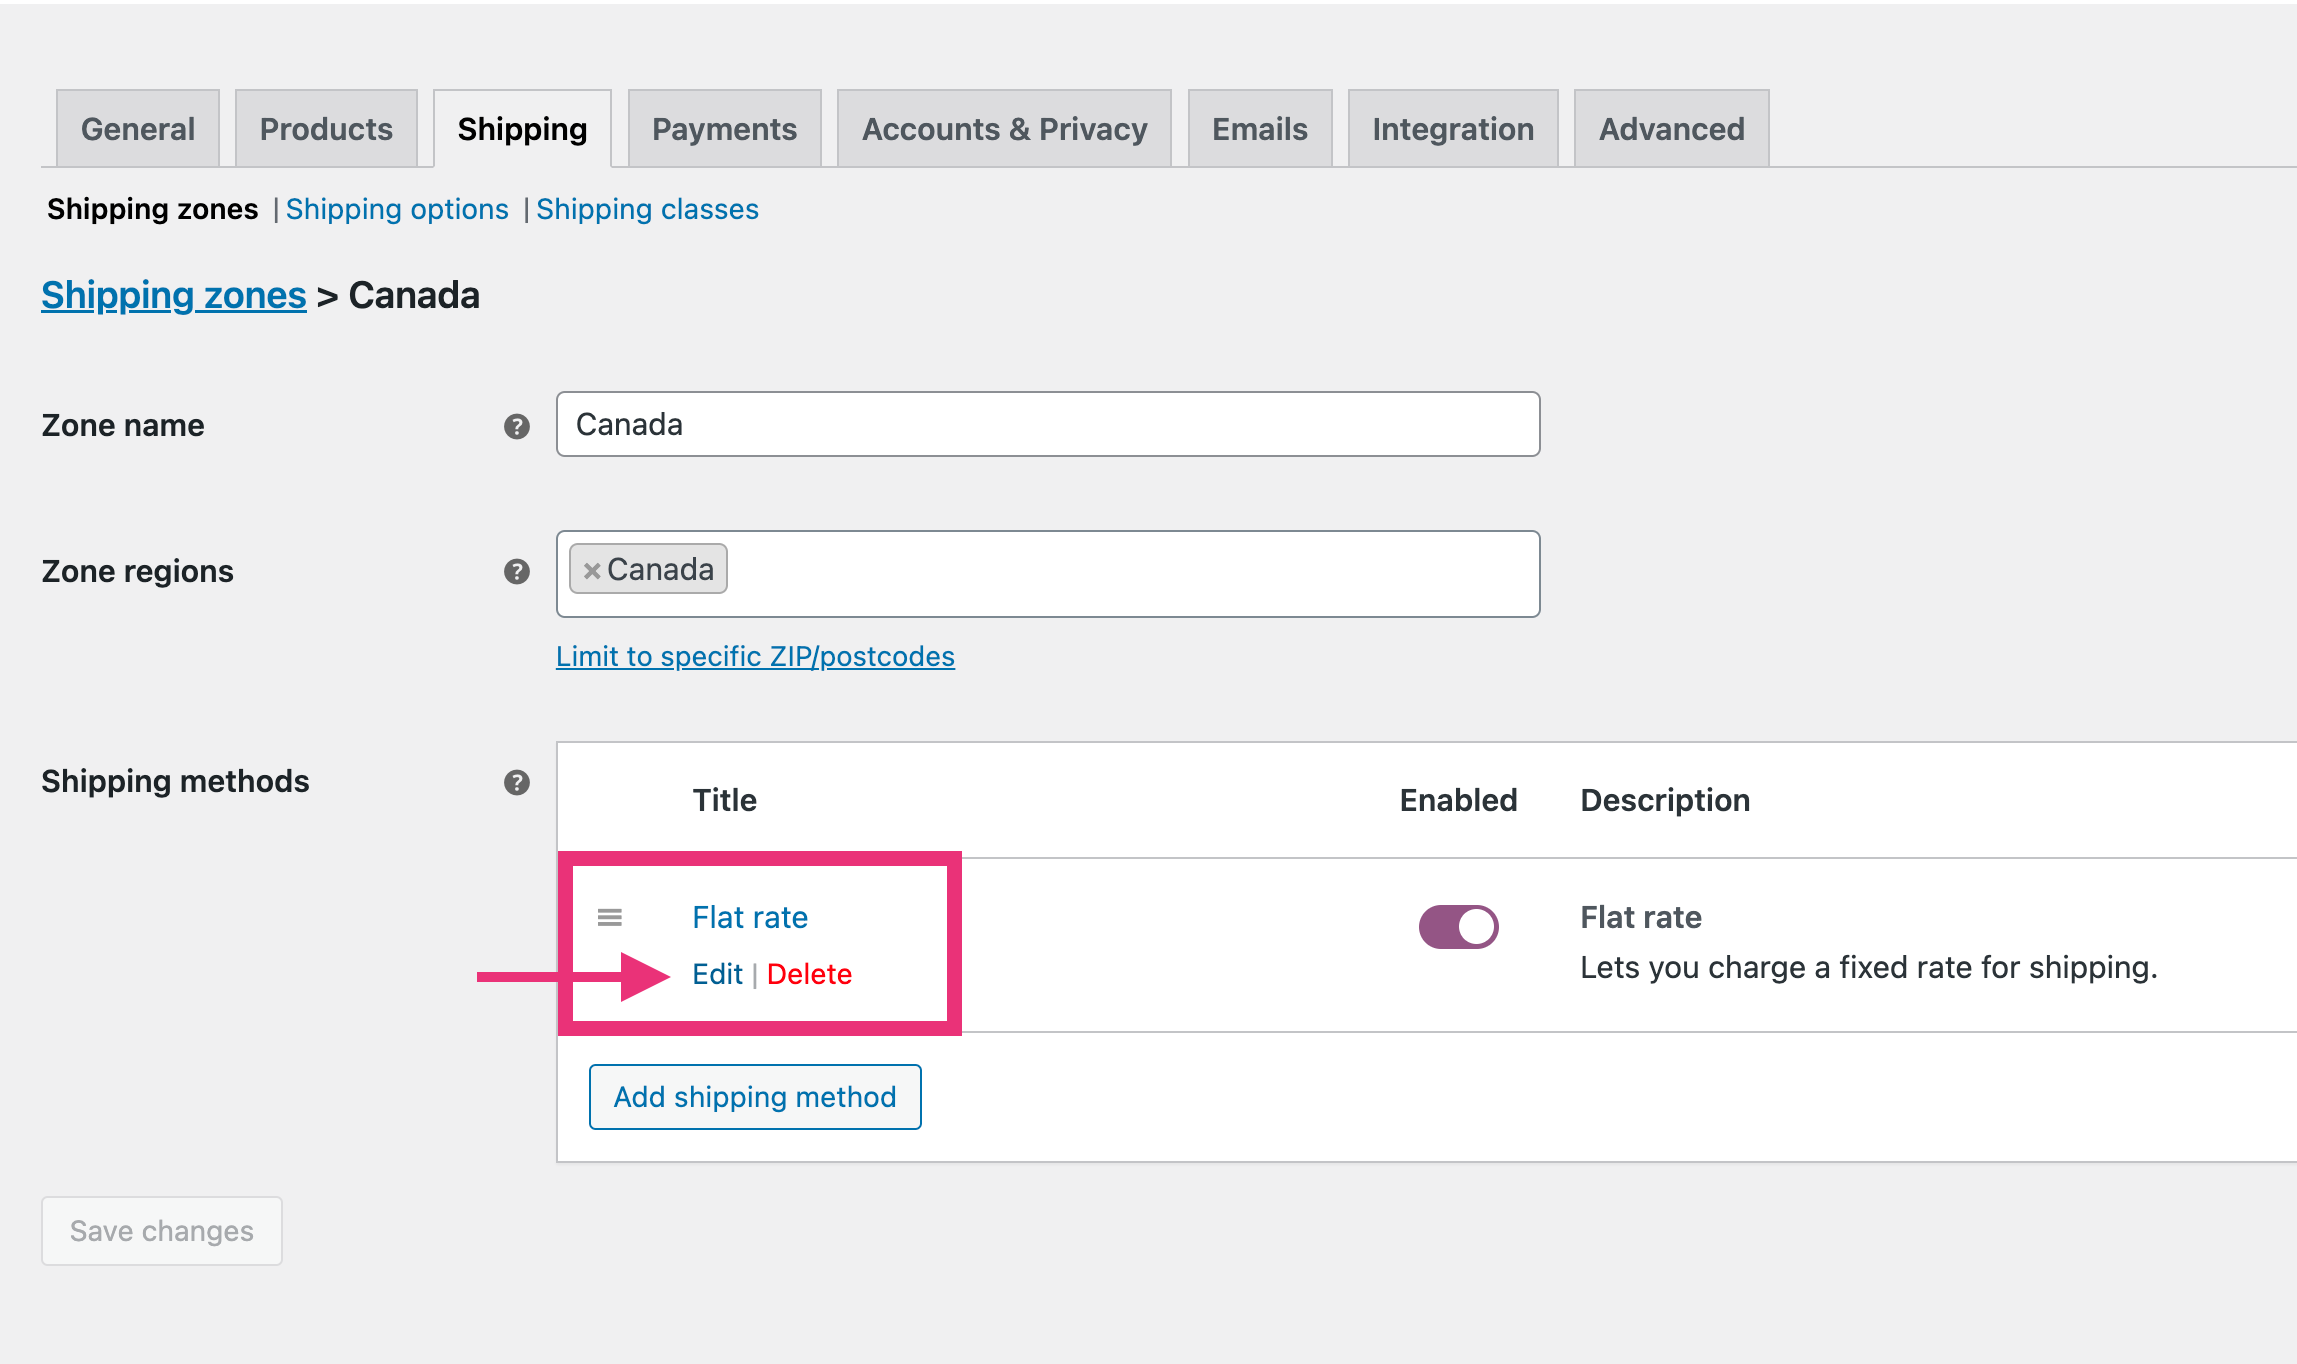
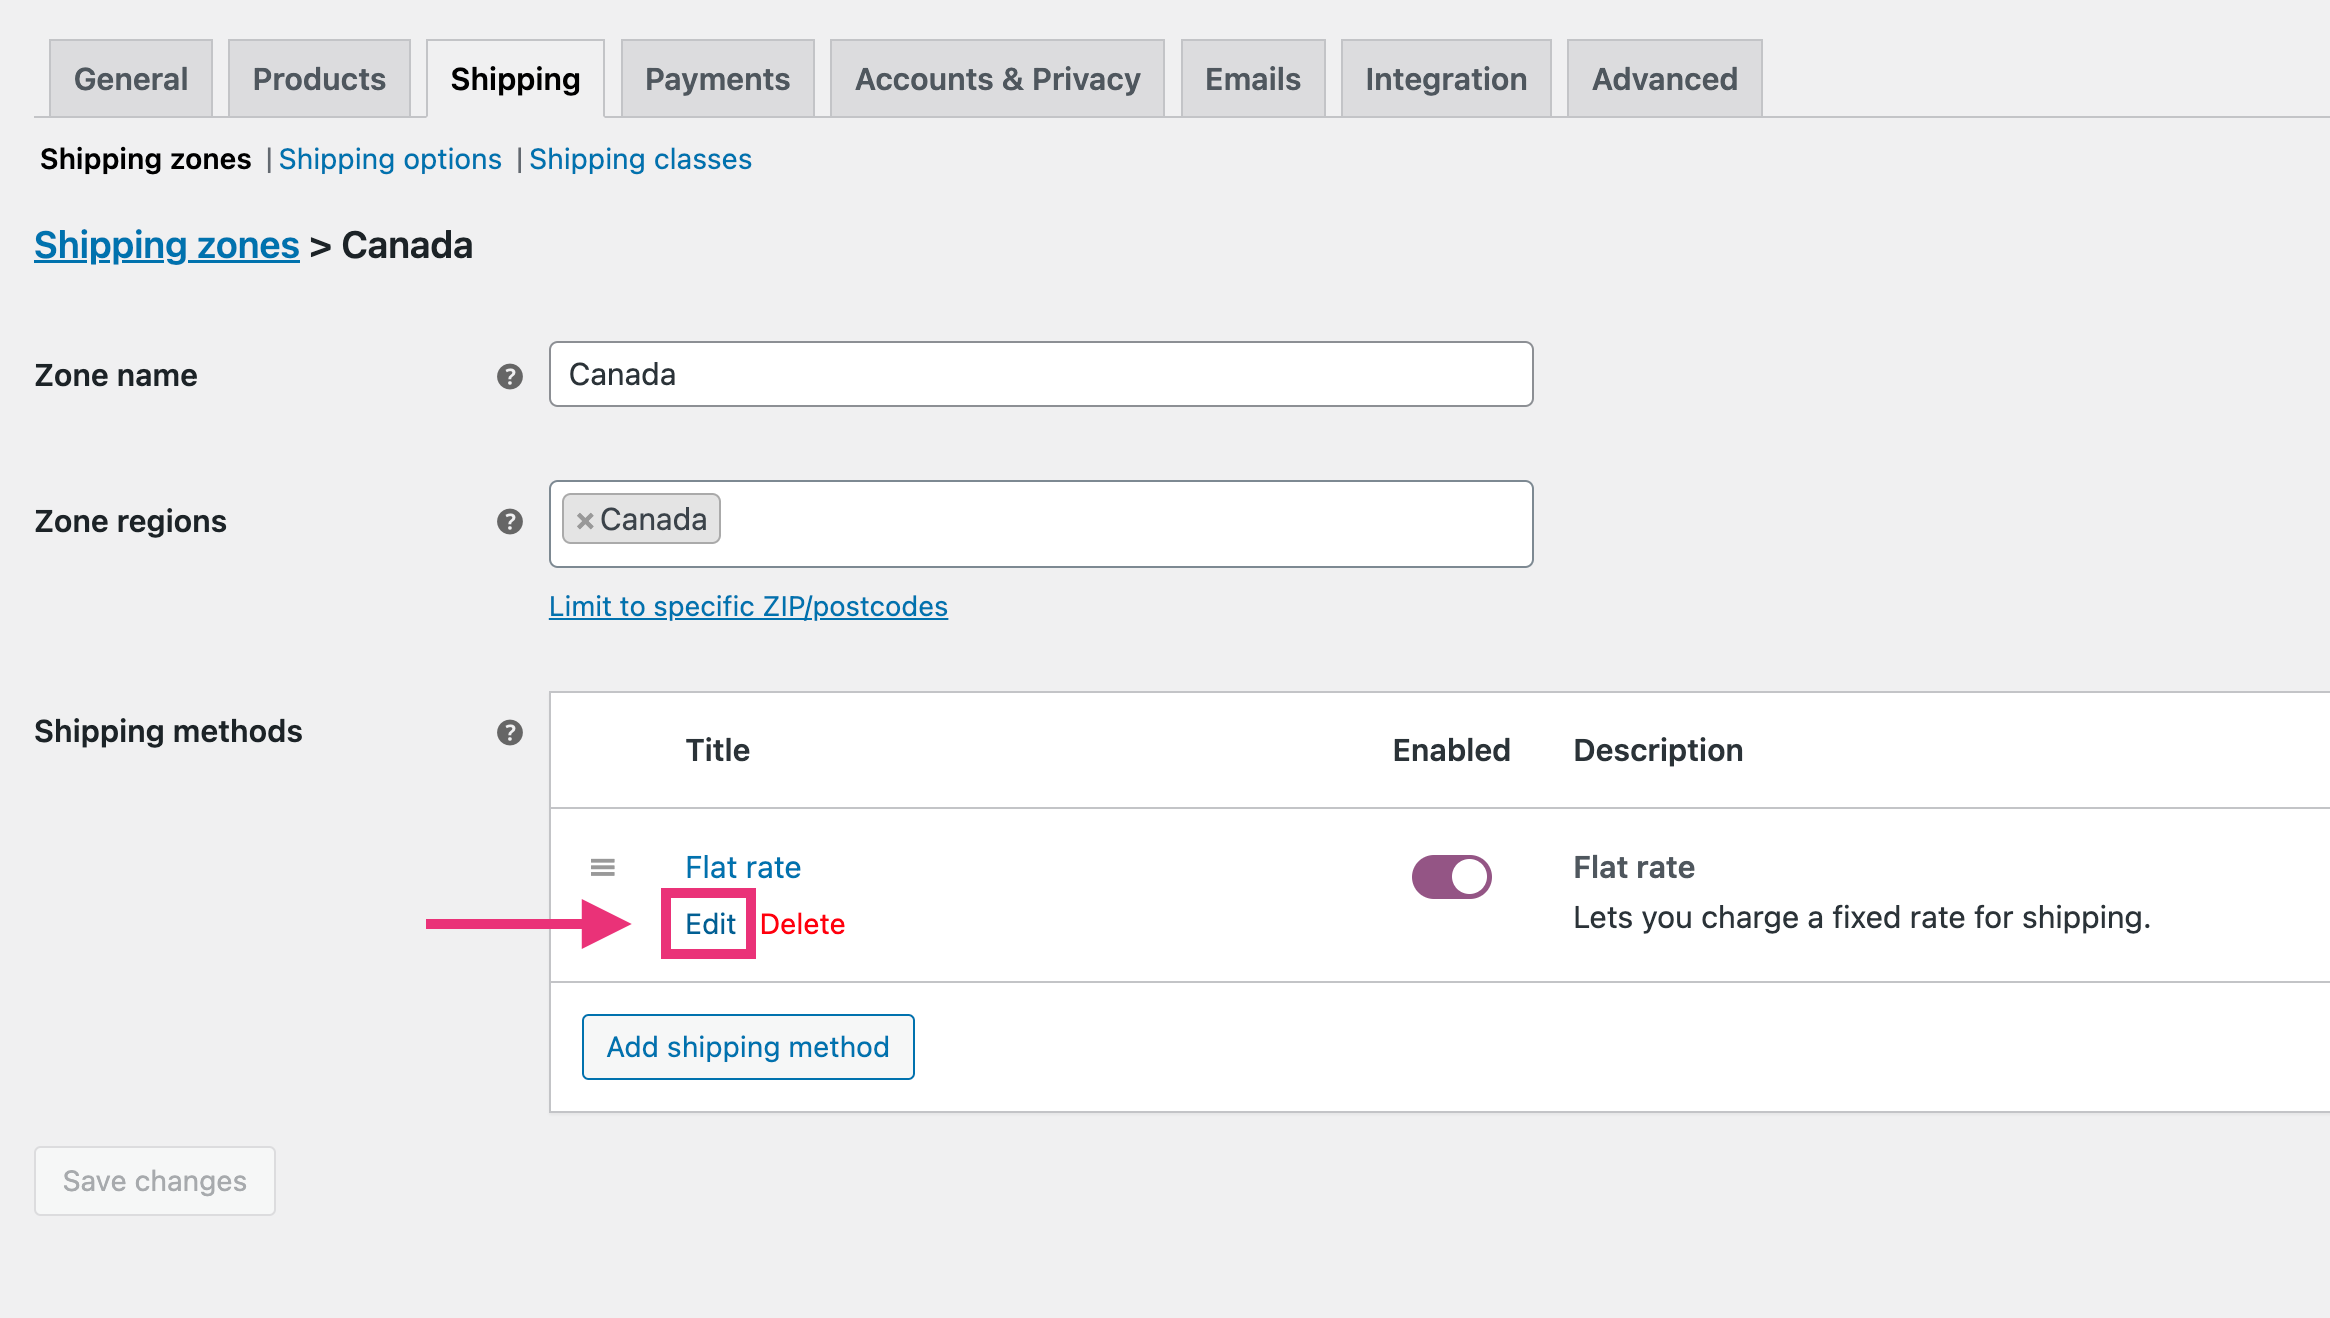
Step 3: Add Rates to Your Methods
- Hover over the rate title and select Edit.
- Set up the Tax Status and Cost of your shipping method.

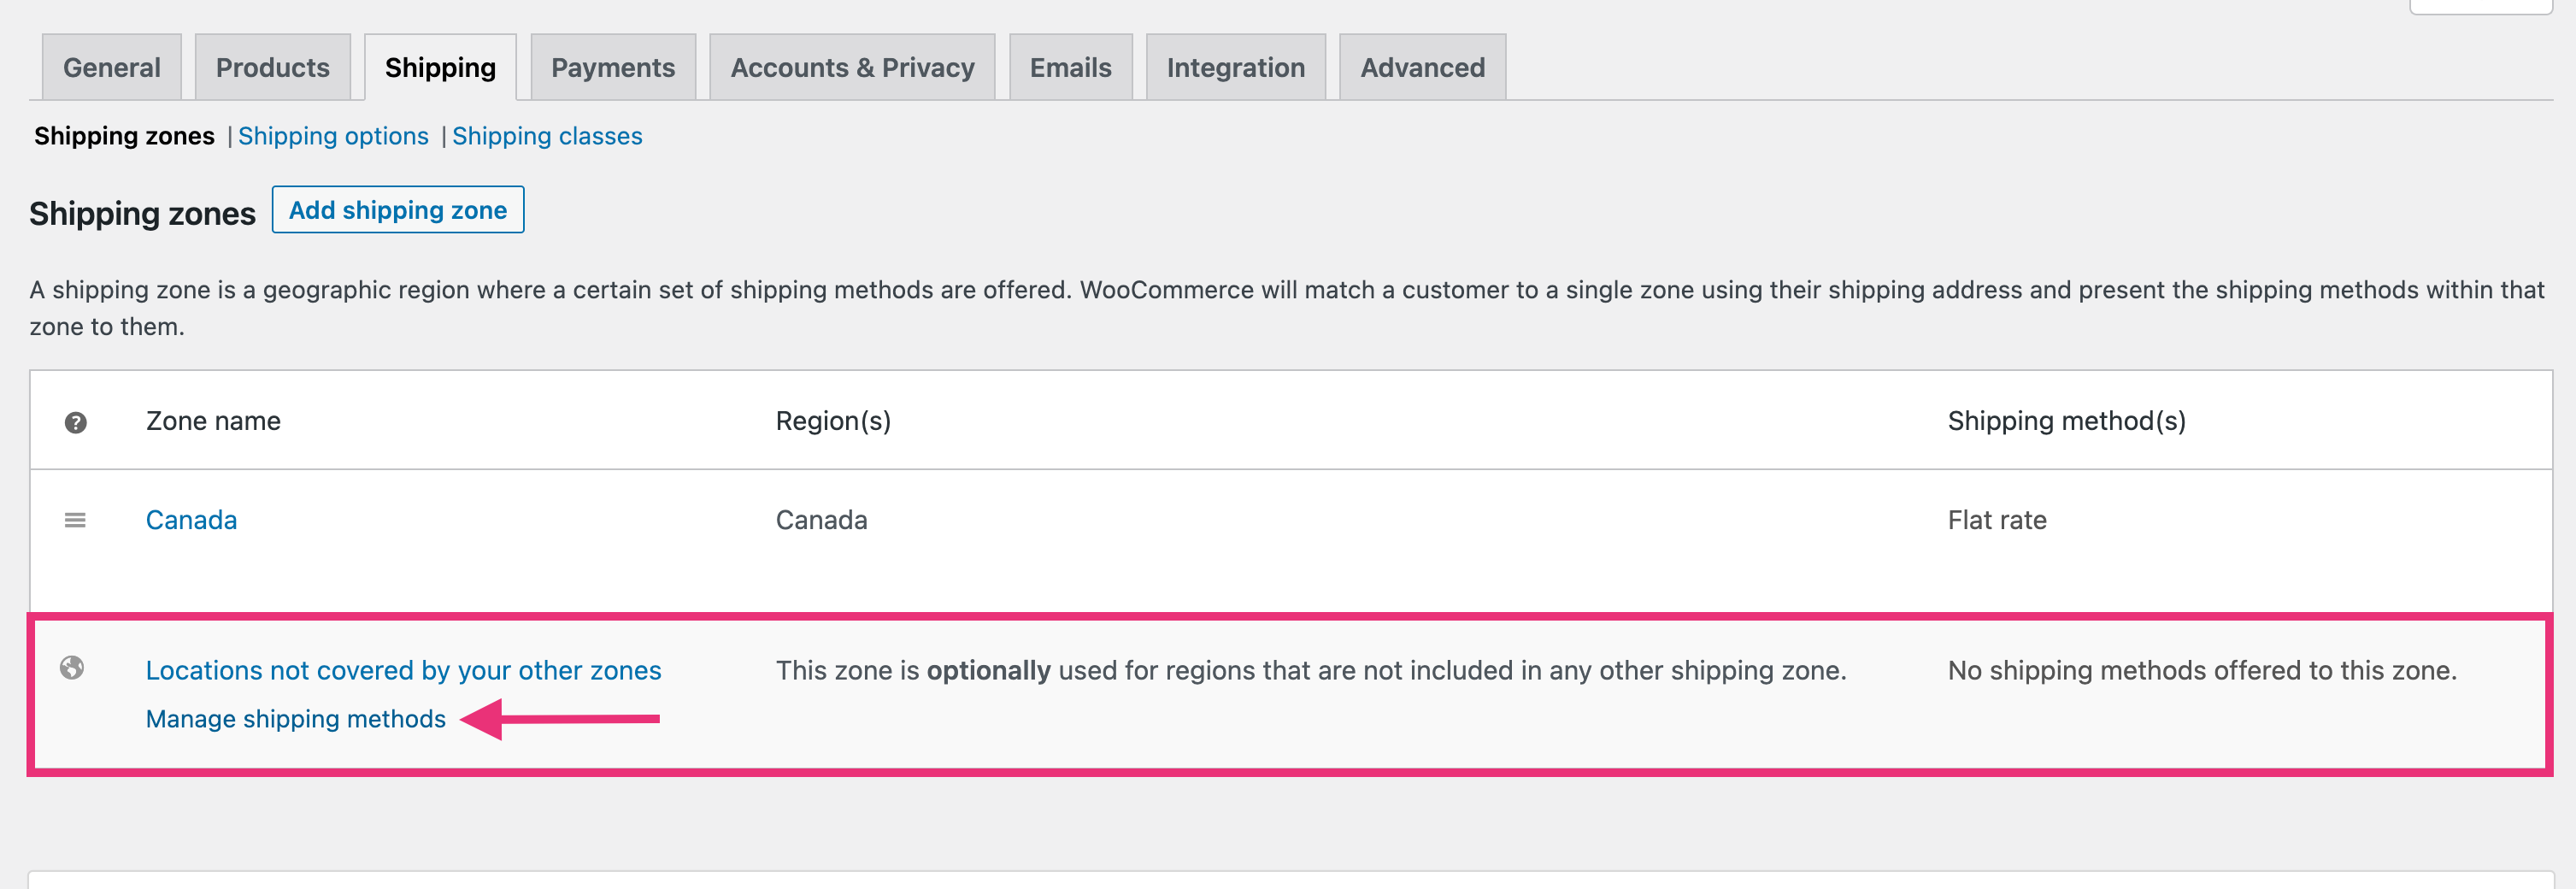
Important:
‘Locations not covered by your other zones‘ acts as a default when no other zones apply. To adjust the methods that will be used as default, hover over the Zone Name and select Manage shipping methods. Repeat the instructions provided above.

Shipping Classes
Shipping classes allow you to group products of similar type and can be configured to determine shipping costs at checkout. While they are not used directly to offer shipping rates to customers, we can use this in concurrence with Shipping Zones and Shipping Methods to calculate rates.
Examples:
- Custom T-shirts have free shipping.
- All 5 x 7 ft picture frames require local pickup.
- Sketchbooks and pencil sets have a flat rate shipping cost of 5$.
Step 1: Setting Up Shipping Classes
- Go to: WooCommerce > Settings > Shipping > Shipping Classes.
- Select Add Shipping Class.
- Enter a Shipping Class Name and description
- You can leave the Slug blank and let it auto-generate, or you can enter one yourself.
- Select Save shipping classes.
Step 2: Assigning Shipping Classes to Your Products
- Go to: WooCommerce > Products.
- Hover over the product and select Edit.
- In the Product Data section go to Shipping, and select the Shipping Class from the dropdown menu.
Note: Each product can only have one shipping class.
How We Can Use Them Together
You have a product that where the shipping rate changes depending on if you’re going to ship international vs domestic. We can do this by setting up different rates for a class in a zone. For example, you have two different sized picture frames that require different flat rates of shipping depending on product size and location:
| Product | Shipping Canada | Shipping US |
|---|---|---|
| Small Picture Frame – $30 | Flat Rate: $4 | Flate Rate: $6 |
| Medium Picture Frame – $40 | Flate Rate: $7 | Flate Rate: $9 |
We create two zones, Canada and US. Then we set up shipping classes for the Small Picture Frame and Medium Picture Frame for each zone individually. See below:
- First we set up our shipping zones.
- Second, we set up the shipping classes and assign them to each product. For Example:
- Small Picture Frame – Small Items Shipping Class
- Medium Picture Frame – Medium Items Shipping Class

- Next, we go back to Shipping Zones. For each zone, edit your shipping method to adjust the rate for a particular shipping class.
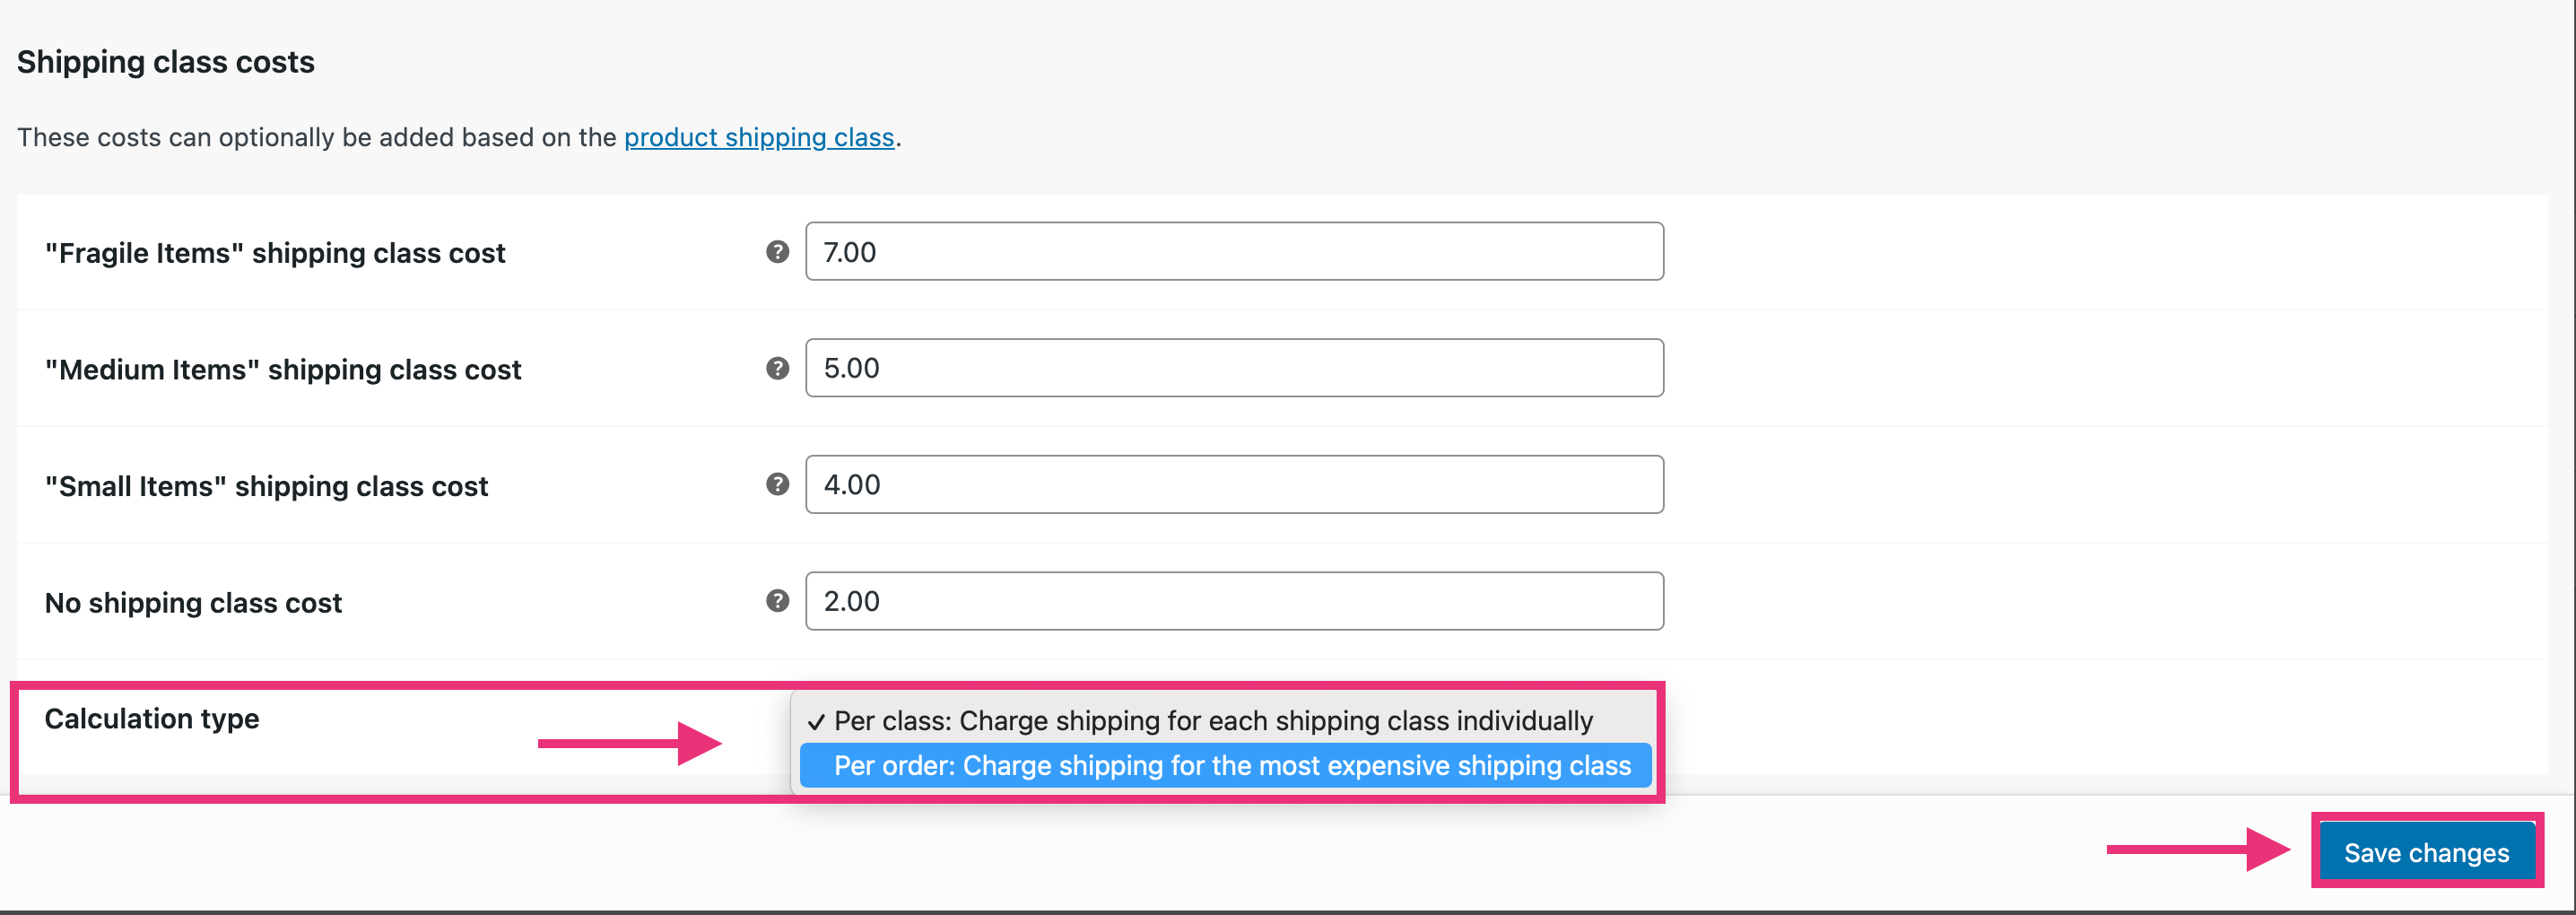
- Note: It is important to set the ‘Cost’ field in the top section to zero – otherwise it will ADD to your shipping class rate.
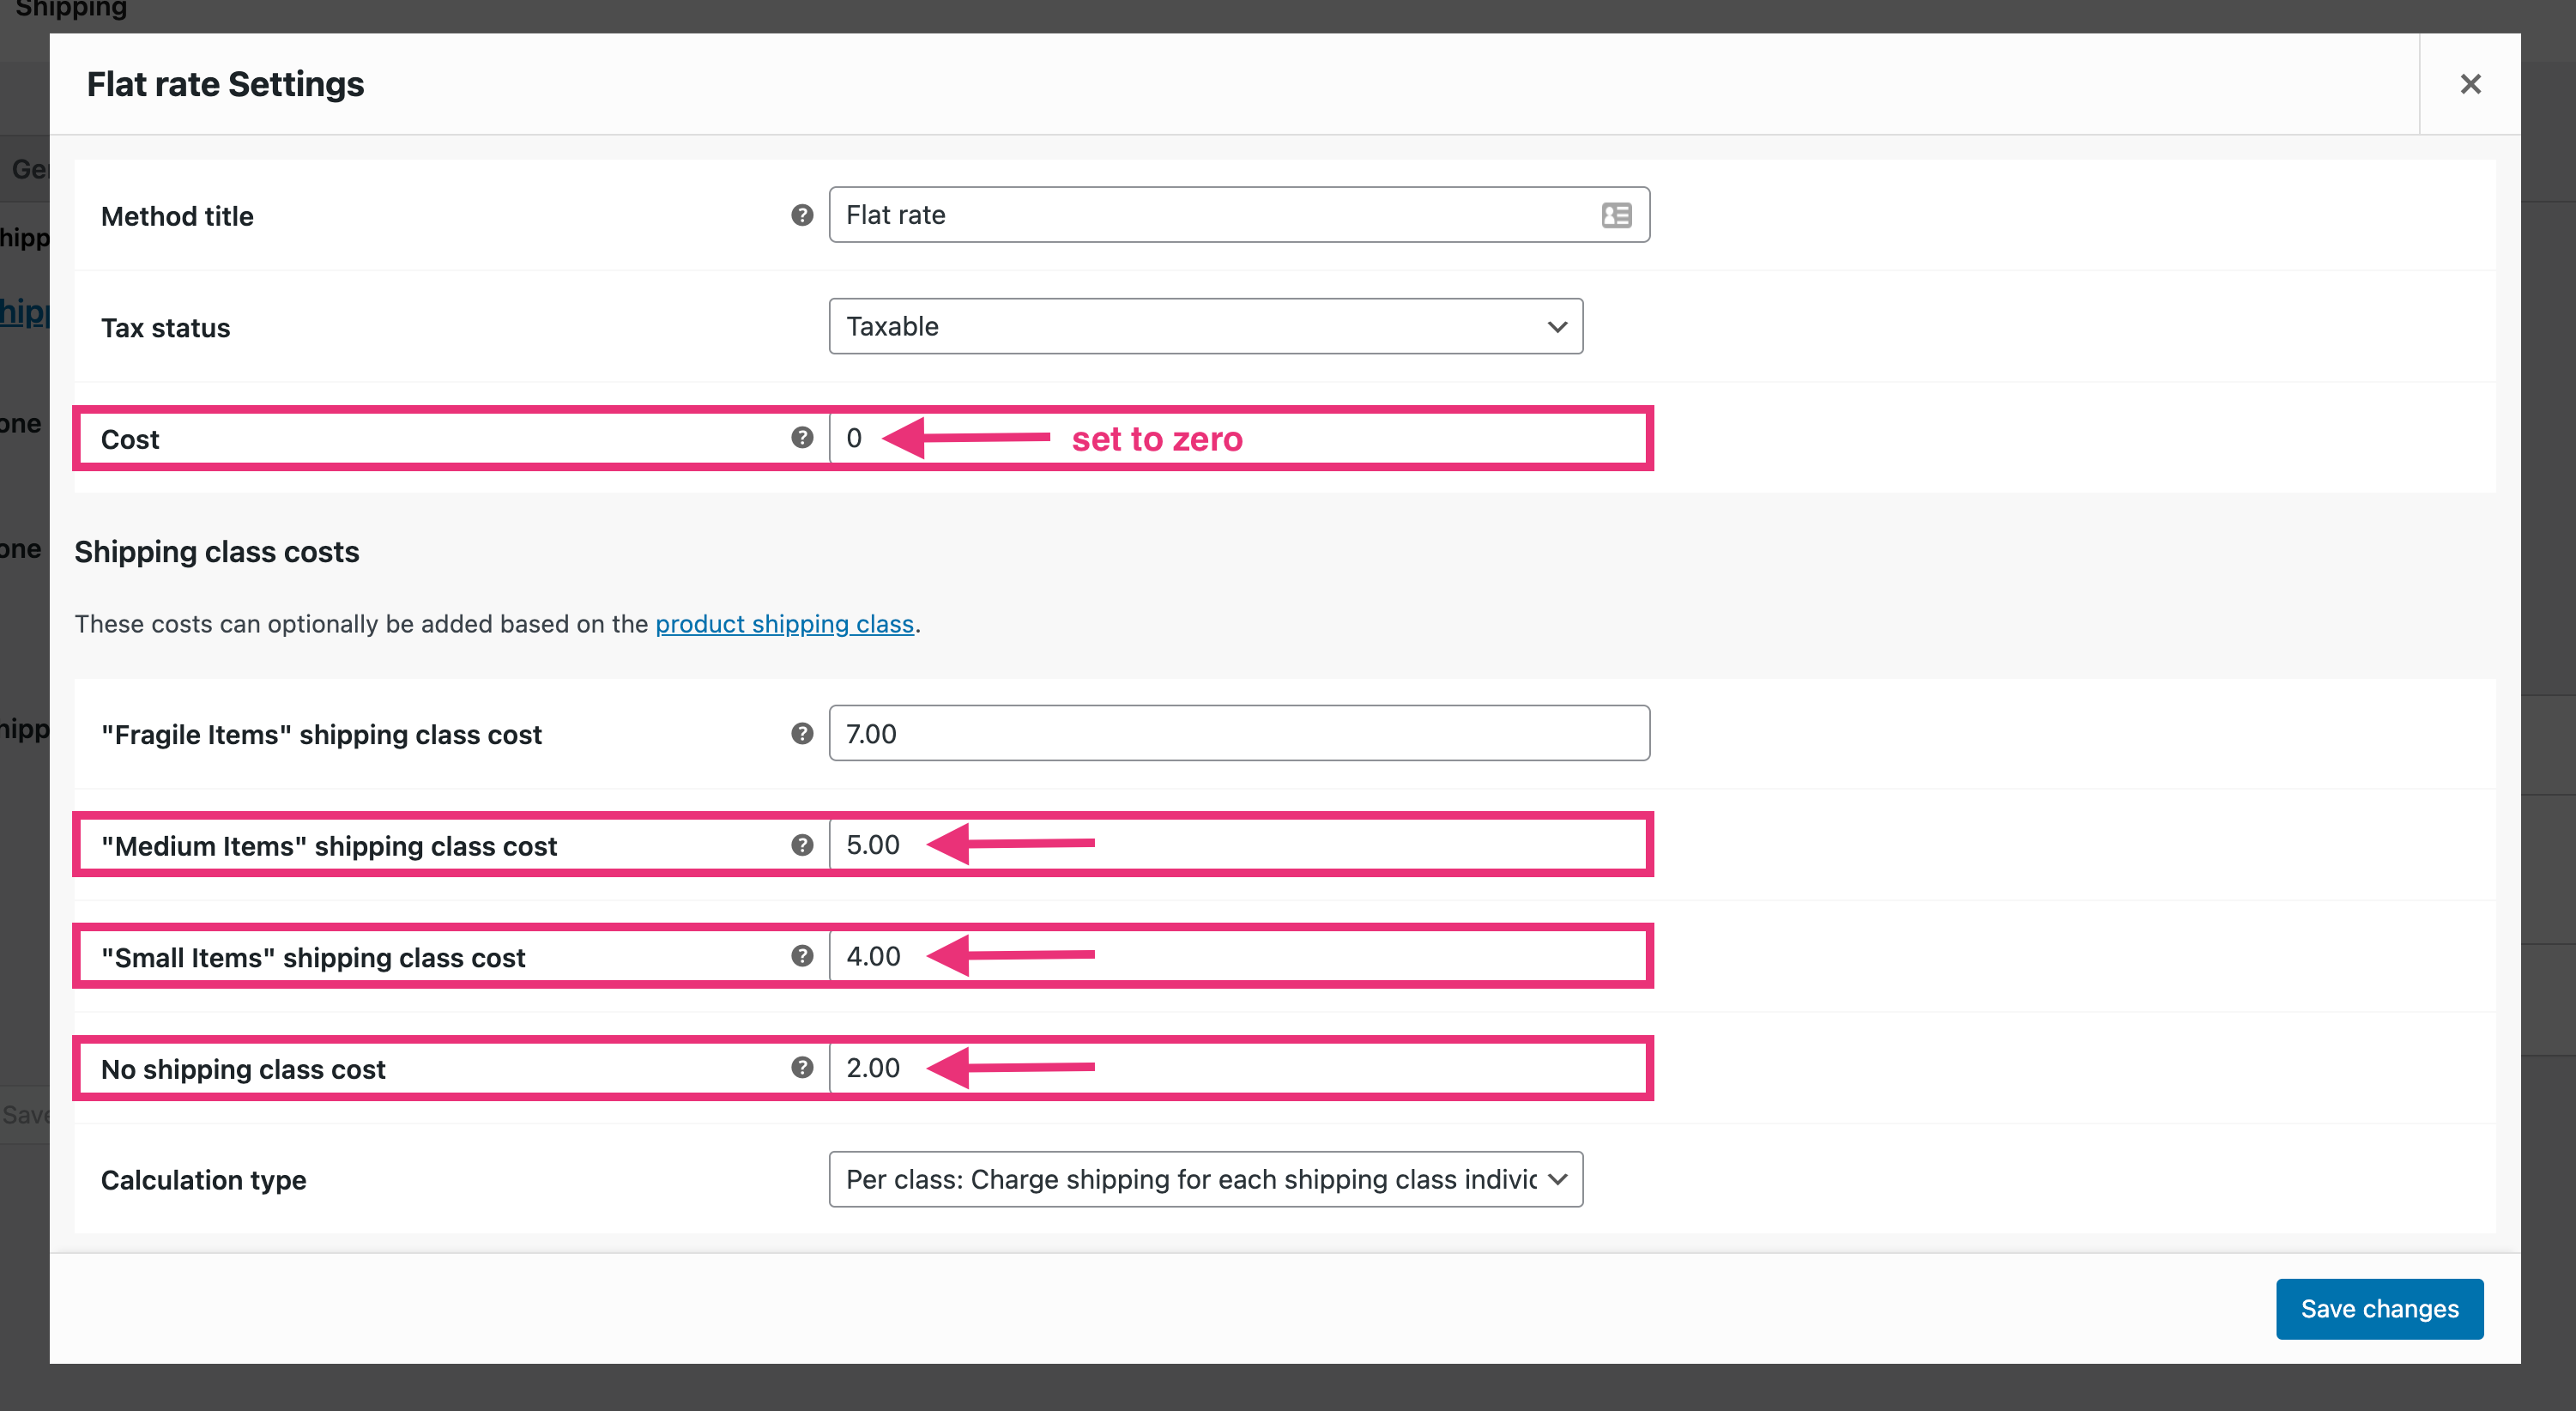
- The last step is to choose your Calculation Type:
- Per Class: Charge shipping for each shipping class individually
- Per Order: Charge shipping for the most expensive shipping class only.
- And save your changes: